What to Check Before Turning On Your Furnace for the First Time
The first cold morning in Utah County always arrives sooner than expected, and most people reach for the thermostat without giving the furnace a second thought. That first startup puts a heating system through more stress than almost any other day of the season, because months of dust, debris, insect activity, and settling have quietly changed conditions inside the cabinet and the venting. A short round of checks before you switch the thermostat over to heat can prevent a no heat call in the middle of December, cut wasted fuel, and keep combustion byproducts moving safely outside where they belong. Some of these checks are things any homeowner can handle in about twenty minutes with a flashlight, a fresh filter, and a little patience. Others involve gas pressure, combustion analysis, and heat exchanger inspection, and those tasks belong to a licensed technician with the right instruments. This guide walks through both categories in order, so you know exactly what to look at yourself and what needs professional eyes before the first burn of the season. Treat it as a preseason routine you repeat every fall rather than a one time project.
Safety Checks Before Turning On Your Furnace for the First Time
Safety comes before performance every single time, because a furnace that runs poorly wastes money while a furnace that vents poorly puts people at risk. Gas furnaces produce carbon monoxide as a normal byproduct of combustion, and the entire venting system exists to carry that gas outside the building envelope. Over a long summer, that venting can shift, corrode, or fill with debris, and nothing about the appliance will warn you until it runs. The area around the furnace also tends to collect stored items during warm months, which restricts combustion air and creates fire risk. Working through these safety checks first means that when you finally do call for heat, the system has a clear path for air in and exhaust out. Everything in this section can be inspected visually without tools, though anything that looks wrong should stop the process immediately.
Gas Line and Carbon Monoxide Safety Checks Before You Turn On Your Furnace
Start at the gas piping that feeds the furnace and follow it visually from the shutoff valve to the appliance connection. The manual shutoff valve should sit parallel to the pipe when it is open, and a valve handle sitting crosswise means gas is off at the appliance. Look closely at the flexible connector for kinks, sharp bends, corrosion, or any point where it rubs against sheet metal, since these connectors are not rated for tension or abrasion. Sniff the area near the valve and the union fittings, because natural gas is odorized with mercaptan specifically so that small leaks announce themselves as a rotten egg smell. If you detect that odor at any strength, do not flip switches, do not light anything, and do not run the furnace; leave the building and call the gas utility from outside. Corrosion, white mineral crust, or a bubbling residue on a fitting all suggest a slow leak that has been weeping for some time. Utah homes with older piping runs also tend to have joints that were disturbed during other work, so any recent plumbing or remodeling near the mechanical room deserves a closer look.
Carbon monoxide alarms are the second half of this check and they are the part homeowners skip most often. Every level of the home should have a working carbon monoxide alarm, with one located within about fifteen feet of sleeping areas so it wakes people who are asleep. Press the test button on each unit and listen for the full alarm pattern rather than a single chirp, and replace batteries in any alarm that sounds weak or fails to sound at all. Carbon monoxide alarms have a service life of roughly five to ten years depending on the sensor, and most units carry a manufacture date printed on the back housing. An alarm that is past that date can pass a button test while its electrochemical sensor no longer detects gas accurately, which gives false confidence. Replace expired units before the heating season starts rather than after the first cold snap. Combination smoke and carbon monoxide alarms are fine as long as you confirm the carbon monoxide sensor is still within its rated life.
Pay attention to the burner compartment and the area immediately around the draft hood or inducer housing while everything is still cold. Black soot streaking, rust flakes on the burner tray, or scorch marks above the burner opening all point to combustion that has been rolling out rather than drawing properly into the heat exchanger. Those marks do not appear overnight and usually mean the problem existed at the end of last season. A furnace that shows any of these signs should not be run until a technician has evaluated the heat exchanger and draft. Smelling gas near the burners after the unit has been idle for months is also abnormal and warrants a service call rather than a startup attempt. Do you smell gas near your furnace or suspect a leak in your fuel piping? Click here for our gas line repair service and let a licensed technician handle it safely.
Clearance and Combustible Storage Checks Before You Turn On Your Furnace
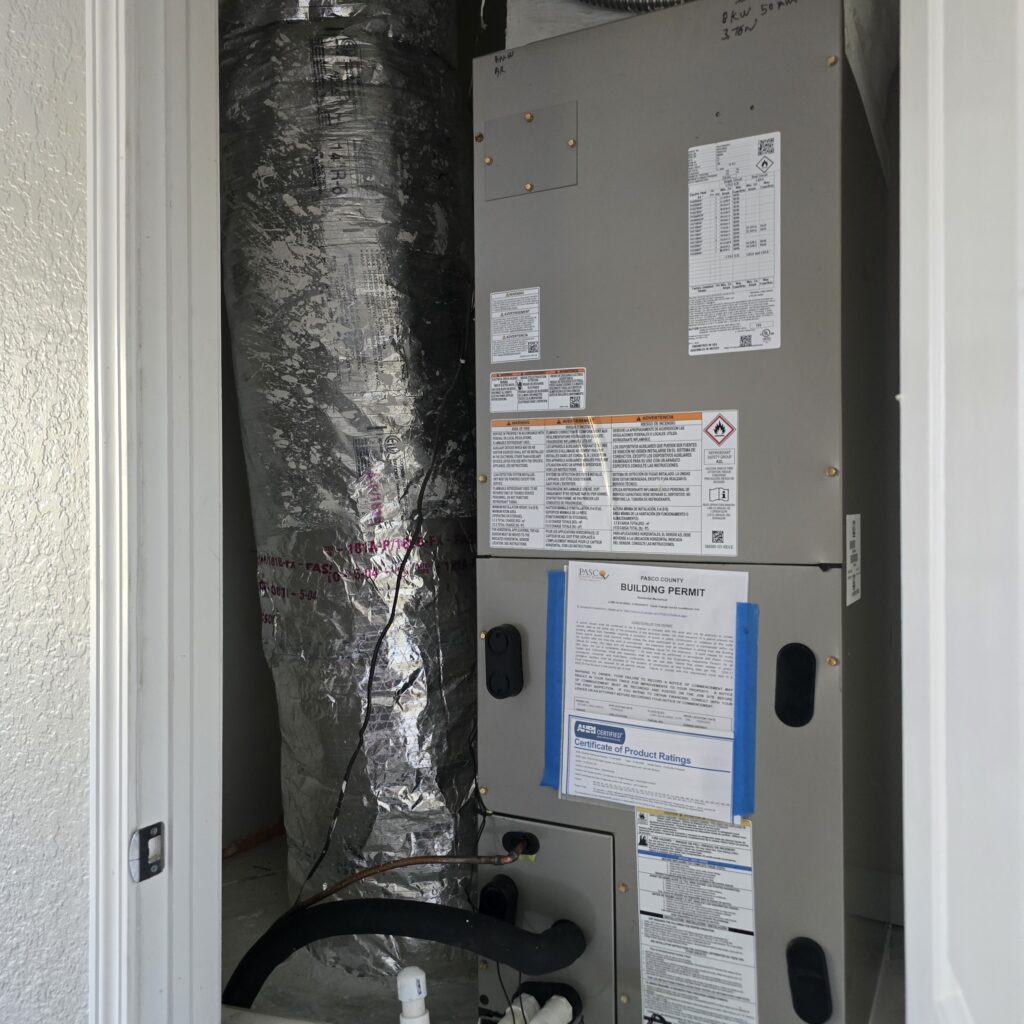
Walk into the mechanical room, garage, or utility closet and take an honest look at what has accumulated around the furnace over the summer. Paint cans, cleaning chemicals, cardboard boxes, holiday decorations, laundry baskets, and stored lumber all migrate toward warm equipment because that space feels unused for half the year. Manufacturers specify minimum clearances to combustibles on the appliance rating plate, and those distances exist because cabinet surfaces and vent connectors reach temperatures that will ignite paper and solvents. A general working rule is to keep three feet of clear space on all accessible sides, which also gives a technician room to open panels and pull the blower assembly. Volatile chemicals deserve extra attention because their vapors get drawn into the combustion air stream and produce corrosive acids inside the heat exchanger. Chlorine based products, aerosol propellants, and paint thinners are the usual offenders in a garage installation. Move all of it well away from the appliance before the first startup.
Combustion air is the second half of clearance, and it is easy to block without realizing it. Furnaces installed in confined spaces rely on louvered doors, wall grilles, or dedicated combustion air ducts to supply the oxygen that the burners consume. Storage stacked against a louvered door, a towel stuffed into a floor grille, or a plastic sheet taped over a wall vent will starve the burners and cause incomplete combustion. Check that every intentional opening into the furnace space is clear and unobstructed, including any duct that runs to the outdoors. In newer sealed combustion installations, the intake is a PVC pipe that terminates outside rather than a grille, and that pipe needs the same attention. Homeowners who finished a basement over the summer should verify that new framing or drywall did not eliminate a required air opening.
Finally, look at the floor and the base of the cabinet for water staining, rust rings, or efflorescence on concrete. Standing water near a furnace usually traces back to a condensate issue from the cooling season, a humidifier that was left running, or a water heater sharing the space. Moisture accelerates corrosion of the burner tray and the bottom of the heat exchanger, and it can short out low voltage controls mounted low in the cabinet. Sweeping and drying the area before startup also reduces the volume of dust that gets pulled through the blower on the first run. If the pad or platform under the unit has deteriorated, mention it to your technician so the cabinet stays level and supported. A level cabinet matters more than most people expect, because condensing furnaces rely on proper pitch to drain water out of the secondary heat exchanger.
Vent Pipe and Flue Safety Checks Before You Turn On Your Furnace
Follow the vent from the top of the furnace as far as you can see it and check every joint and support along the way. Metal flue pipe on an older atmospheric furnace should be fully seated at each connection, secured with sheet metal screws, and pitched upward toward the chimney at roughly a quarter inch of rise per foot of horizontal run. A section that has slipped out of a joint, sagged between supports, or separated from the draft hood will dump exhaust gases directly into the room. Look for rust holes, especially at the low points where condensation collects and eats through galvanized steel from the inside out. Any daylight visible through a seam is a reason to stop and call for service before running the appliance. Vent connectors shared with a water heater need the same inspection, since a common vent problem affects both appliances at once.
High efficiency condensing furnaces vent through PVC or polypropylene pipe that terminates through a sidewall or roof, and those terminations are magnets for trouble during warm weather. Birds build nests in intake and exhaust openings, wasps establish colonies inside the pipe, and spiders spin webs that trap enough debris to restrict flow. Go outside and physically inspect both pipes at the termination point, looking into the openings with a flashlight rather than assuming they are clear. Confirm that the screens or termination fittings are still in place and that landscaping has not grown up around the pipes over the summer. Sidewall terminations also need to stay above the expected snow line, which matters a great deal in Utah County where a heavy storm can bury a low termination in hours. Clear a working space around those pipes now so you are not digging them out at midnight in January.
Chimney vented furnaces bring their own set of concerns that get overlooked because the chimney sits out of sight. A masonry chimney that serves a furnace should have an intact liner sized correctly for the appliances connected to it, and deteriorating clay tile produces debris that collects at the base and blocks flow. Look at the cleanout door at the bottom of the chimney for accumulated mortar chunks, brick fragments, or nesting material. Check the exterior of the chimney for spalling brick, missing mortar, and a cracked crown, since water intrusion drives most liner failure. A chimney that vented an older furnace and then had a new high efficiency unit installed may now be oversized and prone to condensation problems. Have the venting evaluated as part of an annual inspection instead of guessing, because vent sizing calculations depend on appliance input, height, and connector length.
Performance Checks Before Turning On Your Furnace for the First Time
Once the safety items check out, the next round of checks determines how well the furnace actually heats and how much it costs to run all winter. Airflow drives nearly everything a furnace does, from temperature rise across the heat exchanger to blower motor amperage to the life expectancy of the entire system. Controls matter just as much, because a thermostat with dying batteries or a miswired terminal will make a perfectly healthy furnace look broken. The first ignition sequence tells an experienced ear a great deal about the condition of the ignitor, the gas valve, and the flame sensor. Working through these checks gives you a baseline for how the system behaves when it is healthy, which makes future problems easier to spot. Homeowners can handle every item in this section without special tools.
Air Filter and Airflow Checks Before You Turn On Your Furnace
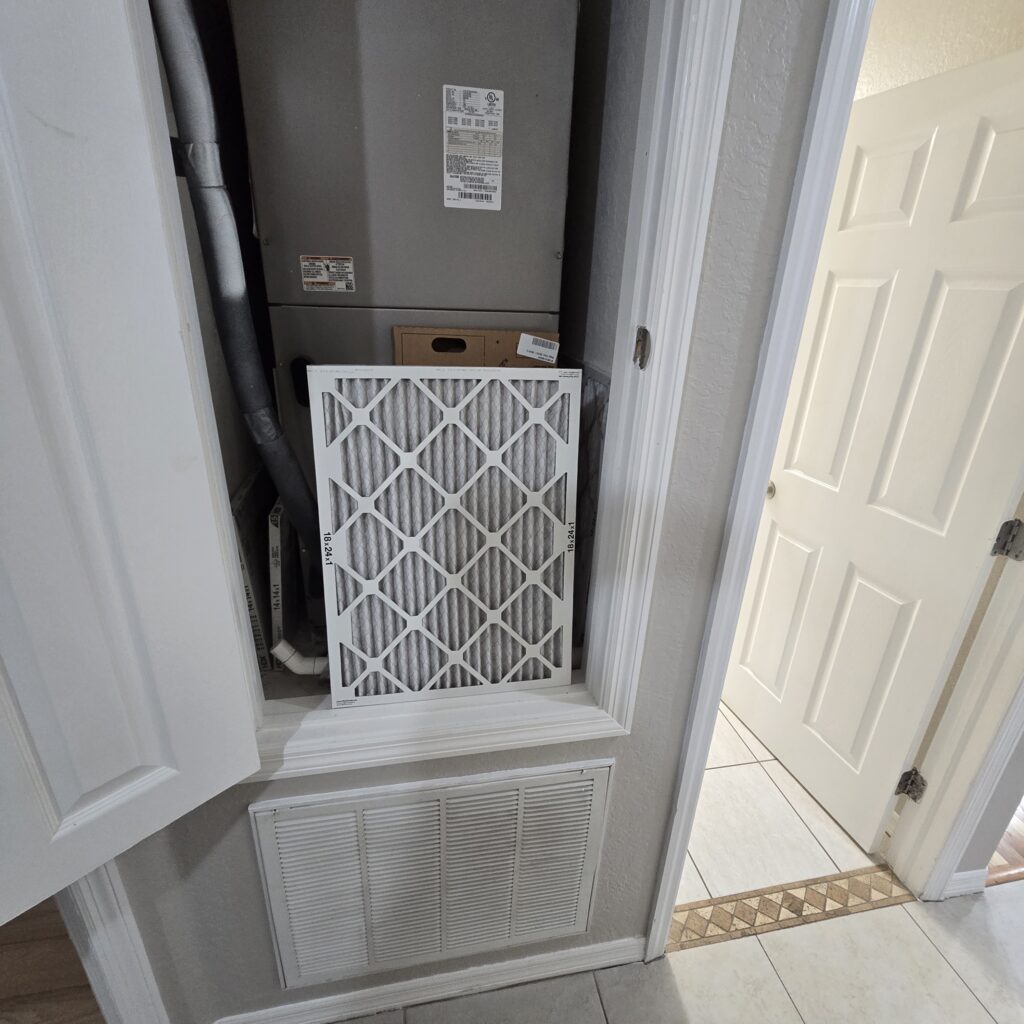
Replace the air filter before the first startup rather than inspecting it and deciding it looks acceptable. Filters that sat in place through an entire cooling season carry summer dust, pollen, pet dander, and often a layer of construction debris from any work done in the home. A restricted filter forces the blower to work against higher static pressure, which reduces airflow across the heat exchanger and raises the temperature rise beyond the range printed on the rating plate. Excessive temperature rise trips the high limit switch, which shuts the burners down while the blower keeps running, producing the classic pattern of a furnace that blows cool air and cycles constantly. Install the new filter with the airflow arrow pointing toward the blower and the furnace, since a backward filter loses efficiency and can collapse into the return opening. Write the installation date on the filter frame with a marker so you know exactly when it went in. Most one inch pleated filters need replacement every one to three months during heavy use, while four and five inch media cabinets typically run six to twelve months.
Filter selection matters more than most homeowners realize, and higher numbers are not automatically better. MERV ratings between 8 and 13 cover the practical range for residential systems, capturing dust, pollen, mold spores, and much of the fine particulate that affects indoor air quality. Pushing to a very high MERV filter in a system that was not designed for the added resistance creates the same restricted airflow problems as a dirty filter. If you want better filtration than a one inch filter provides, the correct solution is a deeper media cabinet or a dedicated air cleaner sized to the equipment rather than a denser filter crammed into the existing slot. Confirm that the filter fits the opening snugly with no gaps at the edges, because air takes the path of least resistance and will bypass a loose filter entirely. Bypassed air deposits dust directly onto the blower wheel and the heat exchanger surfaces.
Airflow does not stop at the filter, so walk the house and check every supply register and return grille. Furniture pushed against a return, rugs covering a floor register, and closed dampers in unused rooms all reduce total system airflow and unbalance the distribution. Registers should be open at least eighty percent throughout the home, and closing off rooms to save money generally raises duct static pressure rather than lowering the bill. Look at accessible ductwork in the crawl space, basement, or attic for disconnected sections, crushed flex duct, and failed tape at the joints. Duct leakage in unconditioned space wastes a meaningful share of the heat the furnace produces and pulls dusty air into the system. If the registers themselves show dark staining or the ducts have not been serviced in years, the distribution system is contributing to poor air quality. Has it been several years since your ductwork was serviced? Click here for our air duct cleaning service to clear out what accumulated over the summer.

Thermostat and Electrical Checks Before You Turn On Your Furnace
Begin at the thermostat by opening the housing and replacing the batteries in any unit that uses them, even models wired for common power. Weak batteries produce erratic behavior that mimics furnace failure, including short cycling, blank displays, and calls for heat that never reach the equipment. Set the system switch to heat and the fan switch to auto, then raise the setpoint several degrees above the current room temperature to create a clear call. Programmable and smart thermostats often reset their schedules after a power interruption, so verify that the programmed setback times still match how the household actually lives. Confirm the displayed room temperature looks reasonable against a separate thermometer, since a thermostat mounted on an exterior wall or near a supply register will read incorrectly and drive uncomfortable cycling. Check that no lamp, television, or appliance has been placed directly below the thermostat where rising heat skews the reading.
Move to the electrical side and locate the furnace service switch, which usually looks like a standard light switch mounted on or near the unit. That switch gets flipped off during summer projects and forgotten, and it is the single most common cause of a furnace that appears dead in October. Verify the circuit breaker feeding the furnace is fully on rather than sitting in a tripped middle position, and reset it firmly if there is any doubt. The blower compartment door must be closed and latched, because a door safety switch cuts power to the entire control board when the panel is removed. Many homeowners pull the door to look inside, set it back in place loosely, and then wonder why nothing happens. Look for a small red or amber diagnostic light visible through the sight glass on the door, since modern control boards flash fault codes there.
Take a moment to record the diagnostic code legend before you need it, because most manufacturers print the flash code chart on the inside of the blower door. Photograph that label with your phone so you can interpret a fault code later without pulling panels in the dark. A steady green or slow flashing light generally indicates normal standby, while rapid flashing patterns correspond to specific faults such as pressure switch failure, flame sensing failure, or limit switch trips. Knowing the code before you call for service shortens the visit and helps the technician arrive with the right part on the truck. Also check any humidifier bypass damper and switch it from the summer position to the winter position if your system includes one. Leaving a bypass damper open all winter wastes conditioned air, and leaving it closed defeats the humidifier entirely.
Ignition, Flame, and First Run Checks After You Turn On Your Furnace
When everything else checks out, initiate a call for heat and stand near the furnace to listen through the full startup sequence. A modern furnace follows a predictable order: the inducer motor spins up first, the pressure switch closes, the hot surface ignitor glows for several seconds, the gas valve opens, the burners light, and the blower starts about thirty to sixty seconds later. Timing that runs long, an inducer that spins without the burners lighting, or a repeated cycle of ignition attempts all point to specific faults worth reporting. Grinding, squealing, or rattling from the inducer or blower indicates bearing wear or a loose component that should be addressed before it fails completely. A loud boom or whoosh at ignition suggests delayed ignition, which allows gas to accumulate before it lights, and that condition needs immediate professional attention. Note anything unusual now while the weather still allows time for a scheduled repair.
Expect a burning smell during the first several minutes of operation, because dust that settled on the heat exchanger and burner surfaces over the summer burns off once the metal reaches temperature. That odor should fade within twenty to thirty minutes and should smell like scorched dust rather than anything acrid, chemical, or electrical. Open a few windows briefly during the first cycle to clear the smell faster and reduce the chance of a nuisance smoke alarm. An odor that persists across multiple cycles, smells like burning plastic, or carries a sharp chemical edge means something other than dust is heating up. Shut the system down and call for service if that happens rather than waiting to see if it clears. A hot electrical smell in particular can indicate a failing blower motor, a loose wire connection, or a control board problem.
If you can safely view the burner flames through the sight glass, look at their color and behavior once the system has run for a few minutes. Natural gas burners should produce steady blue flames that pull evenly into the heat exchanger openings, with perhaps a small amount of orange flicker at the tips from airborne dust. Yellow, lazy, or wavering flames indicate incomplete combustion, which produces higher carbon monoxide levels and deposits soot inside the appliance. Flames that roll out toward the front of the burner compartment rather than drawing back into the heat exchanger signal a serious venting or draft problem. Do not attempt to adjust burners, gas pressure, or air shutters yourself, since those settings require a manometer and a combustion analyzer to set correctly. Did your first startup turn up a noise, an odor, or a flame that looked wrong? Click here for our furnace repair service and get it diagnosed before the cold really settles in.
Why You Need a Professional Furnace Inspection Before the First Burn
Homeowner checks catch the obvious problems, and they matter, but they cannot substitute for the measurements a licensed technician takes with proper instruments. Heat exchanger cracks, marginal gas pressure, drifting flame sensor microamps, and elevated carbon monoxide in the flue stream are all invisible without testing equipment. A professional inspection also documents the condition of the system, which supports manufacturer warranty coverage that often requires annual service by a qualified contractor. Scheduling that visit in early fall means you are choosing your appointment time instead of waiting behind emergency calls during the first hard freeze. Vortex Air HVAC serves homes and businesses across Orem, Provo, Lehi, American Fork, Spanish Fork, and the surrounding Utah County communities. Getting the furnace verified now costs far less than replacing a failed component in the middle of winter.
What a Professional Furnace Inspection Covers Before the First Burn
A thorough inspection starts with a visual and instrument based evaluation of the heat exchanger, which is the barrier separating combustion gases from the air you breathe. Technicians use inspection cameras, mirrors, and combustion readings to identify cracks, warping, and corrosion that a flashlight will never reveal. The burners come out for cleaning so that rust scale and dust do not distort the flame pattern, and the ignitor and flame sensor get cleaned and tested against manufacturer specifications. Flame sensors accumulate a thin oxide film that reduces the microamp signal until the control board decides no flame exists and locks the unit out. Cleaning that sensor takes minutes during a scheduled visit and prevents one of the most common no heat calls of the season.
Measurement is what separates a real inspection from a quick look. A technician checks manifold gas pressure with a manometer, measures temperature rise across the supply and return, records blower motor amperage, and verifies static pressure across the system. Those numbers get compared against the values printed on the rating plate, and readings outside the acceptable range point directly to the underlying issue. Combustion analysis at the flue confirms that the appliance is burning cleanly and venting properly, with carbon monoxide levels within safe limits. Safety controls including the pressure switch, rollout switches, and high limit get tested rather than assumed functional. Condensate drains, traps, and neutralizer media on high efficiency units get cleared so the secondary heat exchanger drains freely.
The visit also produces useful information about what comes next. A technician who records the same readings each year can show you a capacitor drifting out of tolerance or an ignitor resistance climbing toward failure, which lets you replace parts on your schedule. Filter recommendations, thermostat programming adjustments, and duct observations all come out of the same appointment. For systems approaching fifteen or twenty years of age, the inspection becomes the basis for an honest conversation about repair costs against replacement value. Ready to get your system checked before the first cold night? Click here for our furnace maintenance service and schedule your preseason tune up.
When to Call for Furnace Repair Instead of a Furnace Inspection
Certain findings move a system out of inspection territory and into repair immediately. Any gas odor, any carbon monoxide alarm activation, and any visible flame rollout or soot deposit means the furnace should be shut off and left off until a technician arrives. Repeated ignition lockouts, where the unit tries three times and then stops, indicate a fault the control board has already identified. Water pooling under the cabinet on a condensing furnace usually means a plugged trap or drain line, and that water finds its way into controls if it is ignored. A furnace that runs continuously without satisfying the thermostat is either undersized for current conditions or losing capacity somewhere in the system.
Noise is another reliable signal that a repair visit makes more sense than a routine inspection. Metallic scraping suggests a blower wheel contacting its housing, while a rhythmic clicking often traces to a cracked ignitor or a relay chattering on the control board. Booming at ignition points to delayed lighting, which is a combustion safety issue rather than a nuisance. Rattling sheet metal panels are usually harmless, but a rattle that changes with blower speed can indicate an unbalanced wheel. Describing the noise accurately when you call helps the technician bring likely parts on the first trip.
Rising utility bills without a corresponding change in weather or occupancy deserve attention as well. Furnaces lose efficiency gradually as burners foul, airflow drops, and controls drift, and the cost shows up on the bill long before the house feels cold. Comparing this year’s therms against last year’s for the same billing period gives a rough picture of how the system is trending. Short cycling, where the furnace runs for only a few minutes at a time, burns extra fuel during each startup and shortens component life. Any of these patterns justify a service call now rather than a wait and see approach through the winter.
Why Choose Vortex Air HVAC for Your Furnace Inspection and Tune Up
Vortex Air HVAC is locally owned and operated right here in Orem, and our technicians are licensed and certified for both residential and commercial work. We handle furnaces, heat pumps, mini splits, thermostats, gas piping, ductwork, and commercial refrigeration, which means one company can address the whole mechanical picture instead of handing you off. Our team knows how Utah County weather, elevation, and construction styles affect heating equipment, and that context shows up in the recommendations we make. We arrive on time, explain what we find in plain terms, and give you the measurements behind every recommendation. Nothing gets sold on scare tactics or vague warnings.
Heating failures do not schedule themselves for business hours, which is why we offer 24/7 emergency service throughout Orem, Provo, Lehi, Sandy, West Jordan, Heber City, and the surrounding areas. A furnace that quits at two in the morning during a cold snap becomes a frozen pipe problem within hours, and fast response protects far more than comfort. Our trucks carry the common failure parts for the equipment brands installed across Utah County, so most repairs finish on the first visit. We also handle energy efficient upgrades for homeowners ready to replace aging equipment with systems that cost less to operate. Every recommendation gets sized with a load calculation rather than a guess based on the old unit.
Getting your furnace inspected in early fall is the simplest way to avoid the calls we take every December from people whose systems failed on the coldest night of the year. Call Vortex Air HVAC at (801) 400-2422 or email info@vortexairhvac.com to schedule your preseason furnace inspection. We are located at 776 W 165 S, Orem, UT 84058, and we serve homes and businesses throughout Utah County and the southern Salt Lake Valley. Prompt, professional service backed by licensed technicians is what we have built our reputation on. Book now while appointment times are still open and go into winter knowing your heating system is ready.